
Adelaide United vs Brisbane Roar, 2022-23 Australian A-League Women, Regular Season
· Australian A-League WomenAbout
Adelaide United are hosting Brisbane Roar
at ServiceFM Stadium, Adelaide, Australia, starting on
. The match is a part of the Australian A-League Women.
Match Timeline
- 0': Lineups are announced and players are warming up.
- 0': First Half begins.
- 5': Delay in match because of an injury Jessie Rasschaert (Brisbane Roar FC).
- 5': Delay over. They are ready to continue.
- 7': Attempt missed. Katrina Gorry (Brisbane Roar FC) right footed shot from the centre of the box misses to the right.
- 9': Corner, Adelaide United. Conceded by Talitha Kramer.
- 10': Attempt missed. Emilia Murray (Adelaide United) header from the centre of the box misses to the right. Assisted by Isabel Hodgson following a corner.
- 10': Attempt blocked. Paige Hayward (Adelaide United) left footed shot from the centre of the box is blocked. Assisted by Maruschka Waldus.
- 12': Offside, Brisbane Roar FC. Katrina Gorry tries a through ball, but Shea Connors is caught offside.
- 15': Attempt missed. Nanako Sasaki (Adelaide United) right footed shot from outside the box is high and wide to the right. Assisted by Emily Hodgson.
- 17': Foul by Jenna McCormick (Adelaide United).
- 17': Larissa Crummer (Brisbane Roar FC) wins a free kick in the defensive half.
- 18': Offside, Brisbane Roar FC. Talitha Kramer tries a through ball, but Larissa Crummer is caught offside.
- 20': Delay in match (Brisbane Roar FC).
- 21': Delay over. They are ready to continue.
- 21': Attempt saved. Chelsie Dawber (Adelaide United) right footed shot from the right side of the box is saved in the top right corner. Assisted by Jenna McCormick.
- 22': Foul by Katrina Gorry (Brisbane Roar FC).
- 22': Nanako Sasaki (Adelaide United) wins a free kick in the defensive half.
- 28': Chelsie Dawber (Adelaide United) wins a free kick on the right wing.
- 28': Foul by Hollie Palmer (Brisbane Roar FC).
- 33': Foul by Emilia Murray (Adelaide United).
- 33': Jamilla Rankin (Brisbane Roar FC) wins a free kick in the defensive half.
- 34': Attempt blocked. Emilia Murray (Adelaide United) right footed shot from the right side of the box is blocked.
- 34': Foul by Isabel Hodgson (Adelaide United).
- 34': Talitha Kramer (Brisbane Roar FC) wins a free kick in the defensive half.
- 37': Attempt saved. Chelsie Dawber (Adelaide United) right footed shot from the right side of the box is saved in the centre of the goal. Assisted by Nanako Sasaki.
- 39': Hand ball by Indiah-Paige Riley (Brisbane Roar FC).
- 40': Attempt saved. Shea Connors (Brisbane Roar FC) header from the left side of the six yard box is saved in the centre of the goal.
- 44': Foul by Nanako Sasaki (Adelaide United).
- 44': Katrina Gorry (Brisbane Roar FC) wins a free kick in the defensive half.
- 44': Foul by Meisha Westland (Adelaide United).
- 44': Indiah-Paige Riley (Brisbane Roar FC) wins a free kick in the defensive half.
- 45': Attempt blocked. Shea Connors (Brisbane Roar FC) left footed shot from outside the box is blocked. Assisted by Larissa Crummer.
- 45'+1': Delay in match because of an injury Jamilla Rankin (Brisbane Roar FC).
- 45'+1': Delay over. They are ready to continue.
- 45'+2': Foul by Jessie Rasschaert (Brisbane Roar FC).
- 45'+2': Paige Hayward (Adelaide United) wins a free kick on the left wing.
- 45'+2': Maruschka Waldus (Adelaide United) hits the bar with a header from the centre of the box. Assisted by Nanako Sasaki with a cross following a set piece situation.
- 45'+4': First Half ends, Adelaide United 0, Brisbane Roar FC 0.
- 45': Second Half begins Adelaide United 0, Brisbane Roar FC 0.
- 48': Emily Hodgson (Adelaide United) wins a free kick in the defensive half.
- 48': Foul by Indiah-Paige Riley (Brisbane Roar FC).
- 52': Offside, Brisbane Roar FC. Katrina Gorry tries a through ball, but Shea Connors is caught offside.
- 53': Foul by Chelsie Dawber (Adelaide United).
- 53': Talitha Kramer (Brisbane Roar FC) wins a free kick in the defensive half.
- 58': Foul by Maruschka Waldus (Adelaide United).
- 58': Indiah-Paige Riley (Brisbane Roar FC) wins a free kick on the right wing.
- 61': Foul by Ayesha Norrie (Brisbane Roar FC).
- 61': Meisha Westland (Adelaide United) wins a free kick in the defensive half.
- 63': Corner, Adelaide United. Conceded by Katrina Gorry.
- 64': Attempt missed. Jenna McCormick (Adelaide United) header from the centre of the box is close, but misses to the right. Assisted by Nanako Sasaki with a cross following a corner.
- 65': Substitution, Adelaide United. Katie Bowler replaces Paige Hayward.
- 67': Foul by Emily Hodgson (Adelaide United).
- 67': Katrina Gorry (Brisbane Roar FC) wins a free kick in the defensive half.
- 68': Foul by Chelsie Dawber (Adelaide United).
- 68': Shea Connors (Brisbane Roar FC) wins a free kick on the left wing.
- 68': Shea Connors (Brisbane Roar FC) is shown the yellow card for a bad foul.
- 68': Delay in match because of an injury Chelsie Dawber (Adelaide United).
- 71': Delay over. They are ready to continue.
- 72': Corner, Brisbane Roar FC. Conceded by Maruschka Waldus.
- 72': Delay in match because of an injury Dylan Holmes (Adelaide United).
- 72': Delay in match because of an injury Jessie Rasschaert (Brisbane Roar FC).
- 74': Delay over. They are ready to continue.
- 74': Dylan Holmes (Adelaide United) is shown the yellow card.
- 76': Corner, Adelaide United. Conceded by Katrina Gorry.
- 77': Attempt missed. Isabel Hodgson (Adelaide United) right footed shot from outside the box is too high following a corner.
- 77': Substitution, Adelaide United. Sasha Coorey replaces Meisha Westland.
- 78': Foul by Dylan Holmes (Adelaide United).
- 78': Katrina Gorry (Brisbane Roar FC) wins a free kick in the attacking half.
- 78': Goal! Adelaide United 0, Brisbane Roar FC 1. Jessie Rasschaert (Brisbane Roar FC) header from the centre of the box to the bottom right corner. Assisted by Hollie Palmer with a cross following a set piece situation.
- 81': Foul by Katrina Gorry (Brisbane Roar FC).
- 81': Nanako Sasaki (Adelaide United) wins a free kick in the attacking half.
- 82': Katrina Gorry (Brisbane Roar FC) is shown the yellow card for a bad foul.
- 82': Attempt saved. Jenna McCormick (Adelaide United) right footed shot from more than 35 yards is saved in the top right corner. Assisted by Nanako Sasaki.
- 82': Corner, Adelaide United. Conceded by Hensley Hancuff.
- 82': Substitution, Brisbane Roar FC. Sharn Freier replaces Indiah-Paige Riley.
- 83': Foul by Jenna McCormick (Adelaide United).
- 83': Shea Connors (Brisbane Roar FC) wins a free kick in the defensive half.
- 83': Jenna McCormick (Adelaide United) is shown the yellow card for a bad foul.
- 85': Corner, Brisbane Roar FC. Conceded by Nanako Sasaki.
- 86': Foul by Jamilla Rankin (Brisbane Roar FC).
- 86': Sasha Coorey (Adelaide United) wins a free kick in the attacking half.
- 86': Jamilla Rankin (Brisbane Roar FC) is shown the yellow card for a bad foul.
- 87': Attempt saved. Nanako Sasaki (Adelaide United) right footed shot from more than 35 yards is saved in the top centre of the goal.
- 87': Foul by Katrina Gorry (Brisbane Roar FC).
- 87': Katie Bowler (Adelaide United) wins a free kick on the left wing.
- 88': Corner, Adelaide United. Conceded by Talitha Kramer.
- 89': Foul by Shea Connors (Brisbane Roar FC).
- 89': Katie Bowler (Adelaide United) wins a free kick in the defensive half.
- 90': Attempt missed. Emilia Murray (Adelaide United) right footed shot from the right side of the box is too high. Assisted by Nanako Sasaki.
- 90': Substitution, Adelaide United. Melindaj Barbieri replaces Nanako Sasaki.
- 90'+1': Dylan Holmes (Adelaide United) wins a free kick in the attacking half.
- 90'+1': Foul by Katrina Gorry (Brisbane Roar FC).
- 90'+2': Corner, Adelaide United. Conceded by Jessie Rasschaert.
- 90'+3': Foul by Katie Bowler (Adelaide United).
- 90'+3': Katrina Gorry (Brisbane Roar FC) wins a free kick in the defensive half.
- 90'+4': Emilia Murray (Adelaide United) wins a free kick in the defensive half.
- 90'+4': Shea Connors (Brisbane Roar FC).
- 90'+4': Foul by Maruschka Waldus (Adelaide United).
- 90'+4': Shea Connors (Brisbane Roar FC) wins a free kick in the defensive half.
- 90'+8': Second Half ends, Adelaide United 0, Brisbane Roar FC 1.
- 0': Match ends, Adelaide United 0, Brisbane Roar FC 1.
Statistics
 BRI BRI |
ADE |
|
|---|---|---|
| 12 | Fouls | 13 |
| 3 | Yellow Cards | 2 |
| 0 | Red Cards | 0 |
| 3 | Offsides | 0 |
| 2 | Corner Kicks | 6 |
| 4 | Saves | 1 |
| 39.9 | Possession | 60.1 |
| 4 | SHOTS | 12 |
| 2 | ON GOAL | 4 |
| 0.5 | On Target % | 0.3 |
| 0 | Penalty Goals | 0 |
| 0 | Penalty Kicks Taken | 0 |
| 217 | Accurate Passes | 387 |
| 332 | Passes | 500 |
| 0.7 | Pass Completion % | 0.8 |
| 1 | Accurate Crosses | 4 |
| 15 | Crosses | 23 |
| 0.1 | Cross % | 0.2 |
| 57 | Long Balls | 54 |
| 16 | Accurate Long Balls | 25 |
| 0.3 | Long Balls % | 0.5 |
| 1 | Blocked Shots | 2 |
| 12 | Effective Tackles | 12 |
| 19 | Tackles | 18 |
| 0.6 | Tackle % | 0.7 |
| 15 | Interceptions | 23 |
| 16 | Effective Clearances | 18 |
| 16 | Clearances | 18 |
Game Information
Competition: Australian A-League Women
Venue: ServiceFM Stadium
Location: Adelaide, Australia
Attendance: 1,045
Venue: ServiceFM Stadium
Location: Adelaide, Australia
Attendance: 1,045
Line-Ups
 Adelaide United (4-3-3)
| No. | Name |
|---|---|
| 1 | Annalee Grove (GK) |
| 19 | Maruschka Waldus |
| 6 | Jenna Mccormick |
| 2 | Emily Hodgson |
| 11 | Isabel Hodgson |
| 12 | Nanako Sasaki |
| 16 | Dylan Holmes |
| 14 | Meisha Westland |
| 22 | Emilia Murray |
| 9 | Paige Hayward |
| 10 | Chelsie Dawber |
 Brisbane Roar (4-2-3-1)
| No. | Name |
|---|---|
| 51 | Hensley Hancuff (GK) |
| 5 | Jamilla Rankin |
| 23 | Kajsa Lind |
| 17 | Talitha Kramer |
| 3 | Jessie Rasschaert |
| 10 | Katrina Gorry |
| 7 | Ayesha Norrie |
| 19 | Hollie Palmer |
| 9 | Larissa Crummer |
| 12 | Shea Connors |
| 27 | Indiah-Paige Riley |
A-League Women News

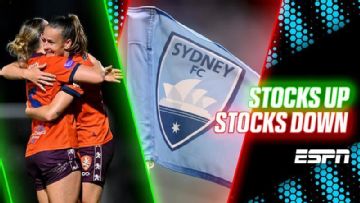
A-League Women stocks up, stocks down: Hopkins celebrates 200th game in style
Jeff Hopkins 200th game at the helm of an A-League Women's team went according to plan, while there's a familiar feeling of stagnation at the Wanderers.

Kennedy White hat trick powers Victory to 4-1 win
Melbourne Victory were unstoppable with Kennedy White's third goal adding to a commanding 4-1 win.
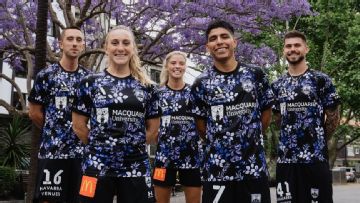
A-League of their own: Sydney FC release stunning Jacaranda kit
Good things apparently come to those who wait because, three weeks into the A-League season, Sydney FC has only gone and dropped arguably the competition's best kit.
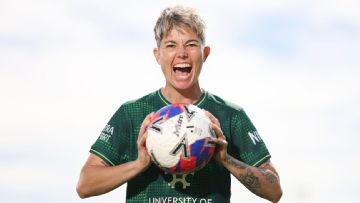
A-League Women stocks up, stocks down: Debuting a 14yo in Round One
Brisbane's stars ensured the Roar began the season with a win, but the spotlight is on Sydney FC after the Sky Blues broke the league's youngest player record.
Chaos in its DNA: Why we're so glad the A-League Women is back
One club in "hibernation," another being propped up one season at a time. The A-League Women is never dull, and there's always a thrill of anticipation as a new season dawns.